Managing your dashboard effectively involves not only adding useful widgets but also removing those that are no longer needed. Removing a widget helps maintain a streamlined and relevant dashboard layout, ensuring that your workspace remains organized and efficient. Here is a guide on how to remove a widget from your dashboard.
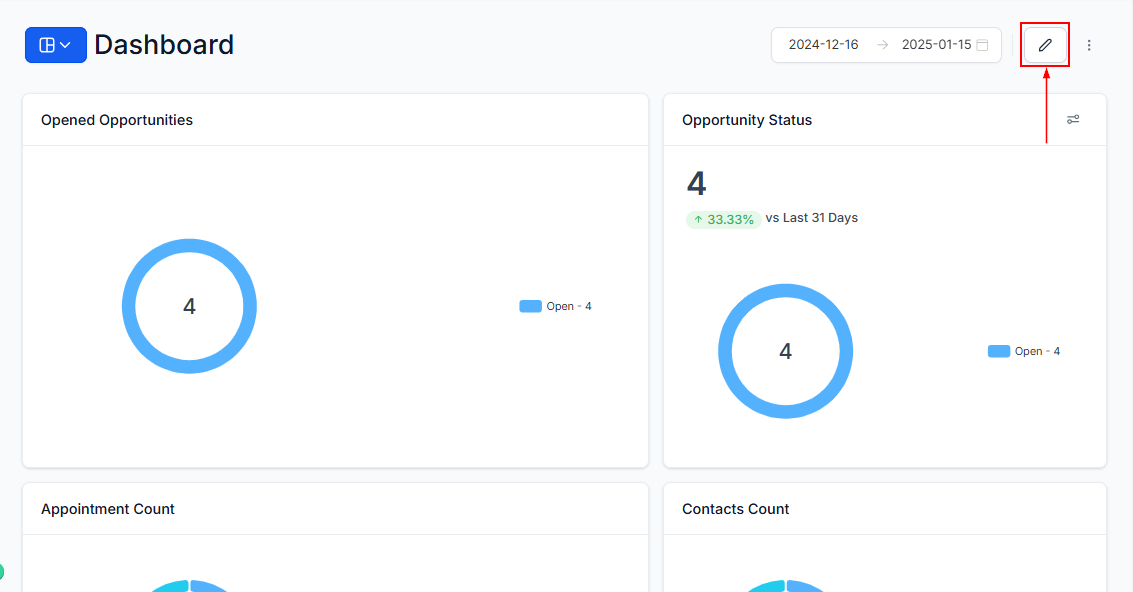
Activate Edit Mode
To begin customizing your dashboard, navigate to the Dashboard section in your account and click the "Edit" button to enter Edit Mode. This allows you to manage and modify your widgets.
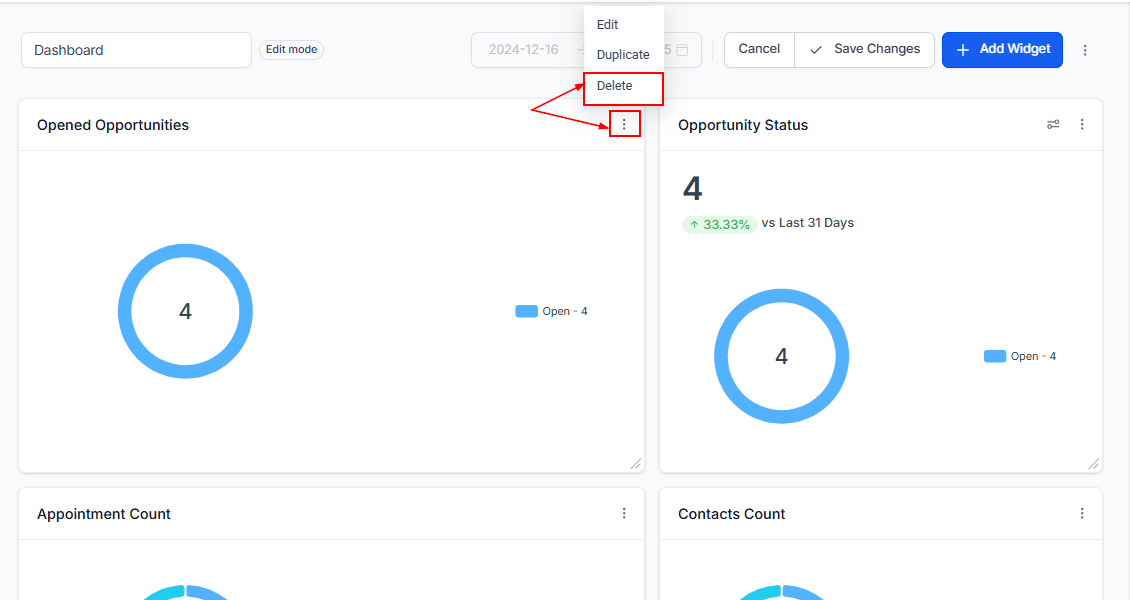
Delete the Widget
Identify the widget you wish to remove, then click the three dots in the upper-right corner of the widget to open a dropdown menu.
From the dropdown menu, select "Delete" to remove the widget from your dashboard.
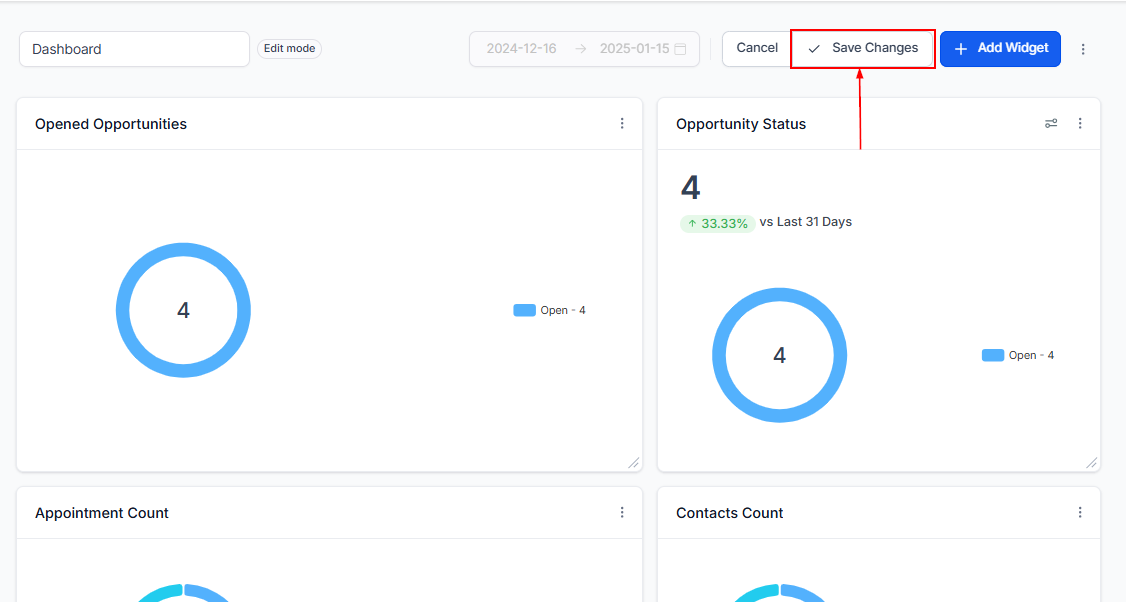
Save Changes
After removing the widget, rearrange the remaining widgets to suit your preferences. Then, click the "Save Changes" button in the top-right corner of the dashboard to finalize the removal and update your layout accordingly.
By following these steps, you can ensure your dashboard remains focused on the most pertinent information, enhancing your overall workflow and productivity.
Was this article helpful?
That’s Great!
Thank you for your feedback
Sorry! We couldn't be helpful
Thank you for your feedback
Feedback sent
We appreciate your effort and will try to fix the article