Custom Objects offers a versatile solution for businesses managing intricate data structures beyond standard contact or opportunity records. This feature empowers users to organize, filter, and visualize data in alignment with their specific operational requirements significantly improving data management, and allowing for a more tailored and efficient approach to handling complex information.
Creating an Object
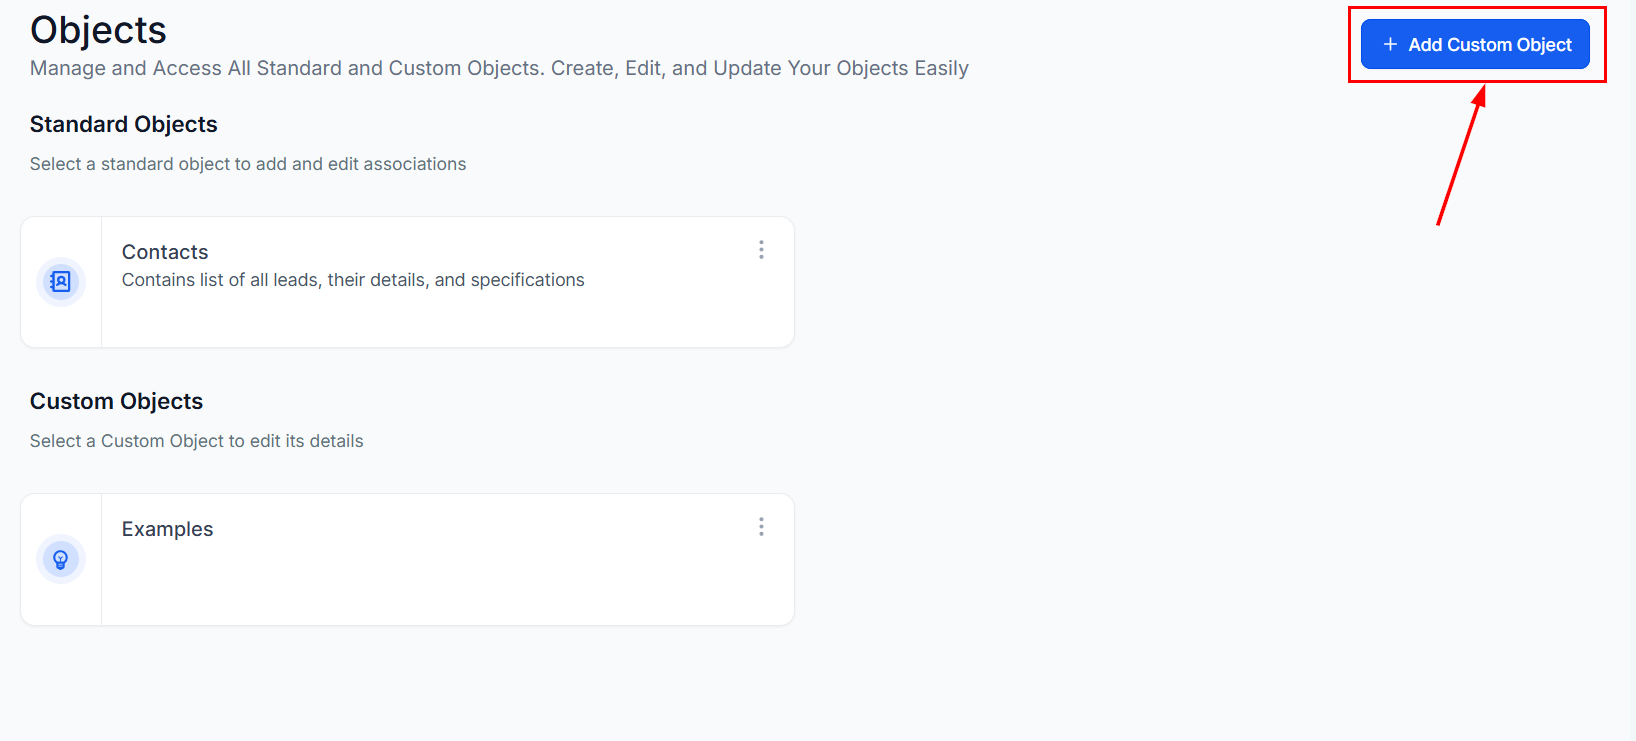
Head to the Objects tab in your account settings, then click the Add Custom Object button to begin.
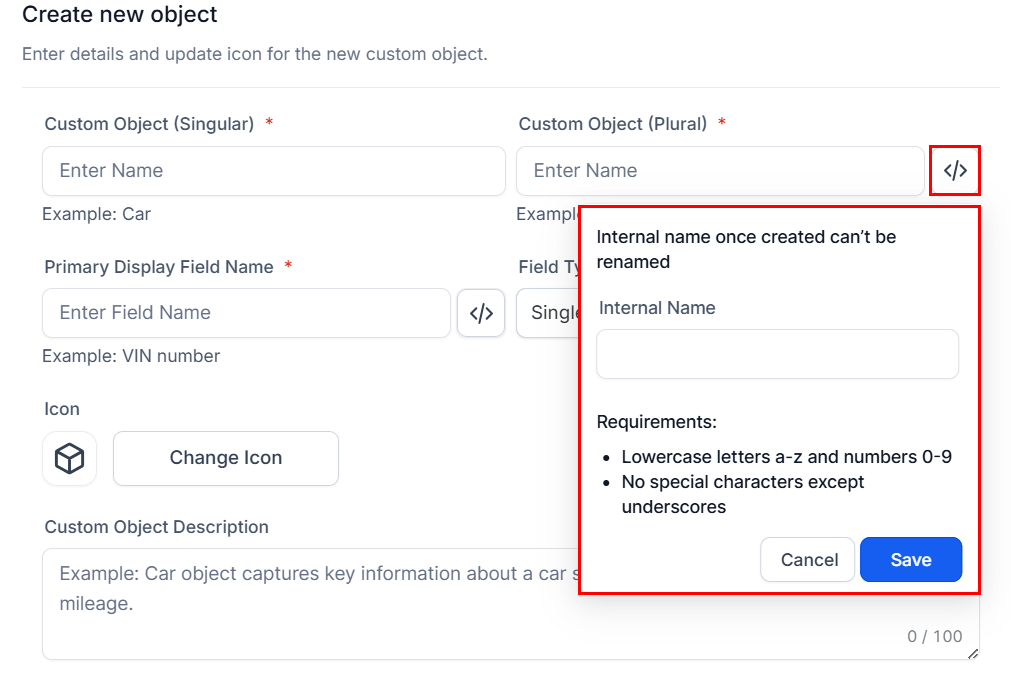
Enter the singular and plural names for your custom object in the designated fields.

Optionally, set an internal name for your object by clicking the icon next to the Plural Object Name field. Once this name has been saved, it cannot be renamed.
Next, enter the property name in the Primary Display Field Name field and add an internal name if required.
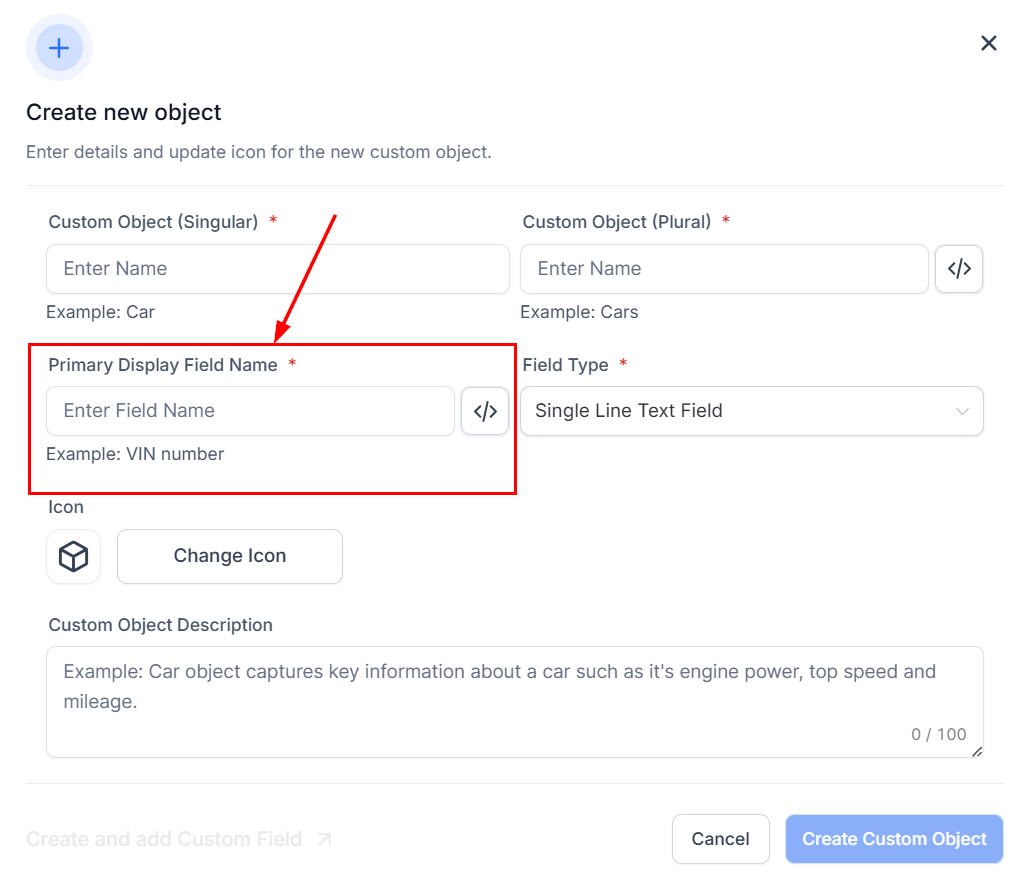
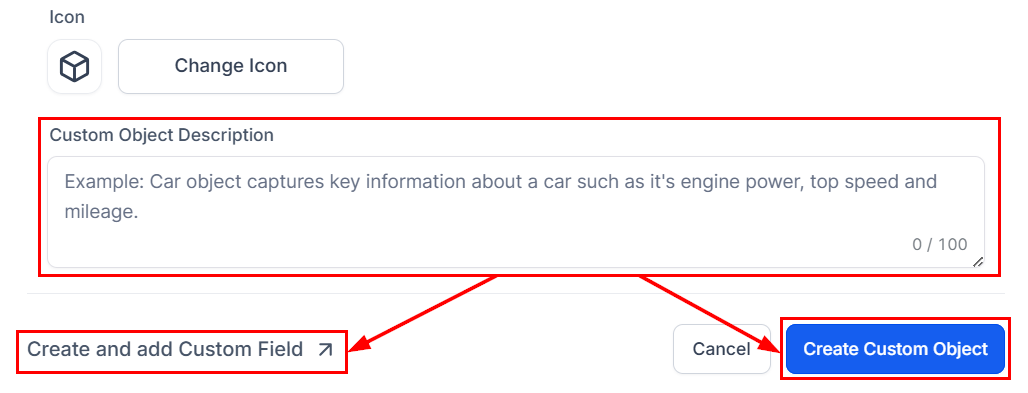
Select an icon to represent your object, utilizing the search bar to locate a specific icon suited to your preferences.

Finally, enter a description of the object in the Description field. Then, choose whether to save the object without adding custom fields or to create custom fields along with the object.
Whether you're managing intricate customer data or specialized business processes, Custom Objects offers the customization necessary to meet your unique needs, ensuring a more organized and effective approach to data management.
? Note: The Single Line Text field is currently the only available choice in the Field Type dropdown menu, but additional field types will be introduced in future updates.
Was this article helpful?
That’s Great!
Thank you for your feedback
Sorry! We couldn't be helpful
Thank you for your feedback
Feedback sent
We appreciate your effort and will try to fix the article