Upon opening a conversation, you can locate the contact details on the right-hand side of the page. All relevant information will be in that section, separated into a few tabs for your convenience. Let's give them a check and learn how to use them!
Contact
This section displays essential information such as the contact name, phone number, and email address. Furthermore, it provides access to other elements like tags, Do Not Disturb (DND) settings, active campaigns, or workflows.
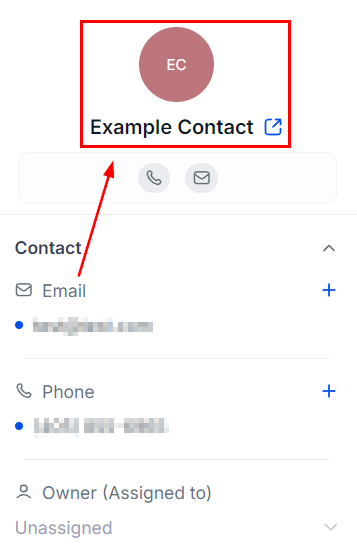
Contact Page
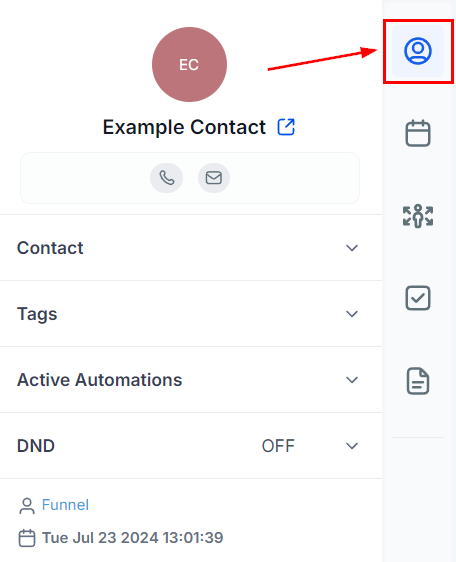
To view all of the contact details, click on the circle icon at the top of the contact card on the right-hand side of the page. This will take you to a new page where you can view all the details of your client and have additional fields where you can add customer information.
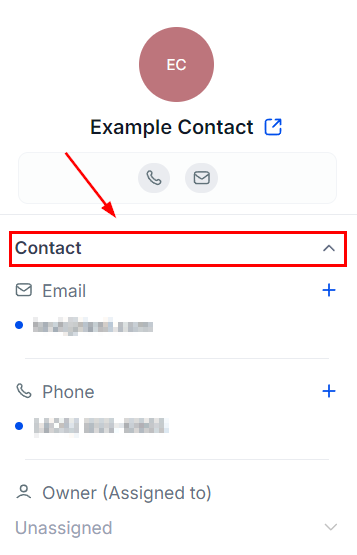
Contact Details
This section contains the customer's name, contact number, and email address. To edit a client's details, simply click on the desired field. Alternatively, you can choose who from your team should be in charge of them by clicking "Assign to" under their name and then selecting a team member from the dropdown list that appears.
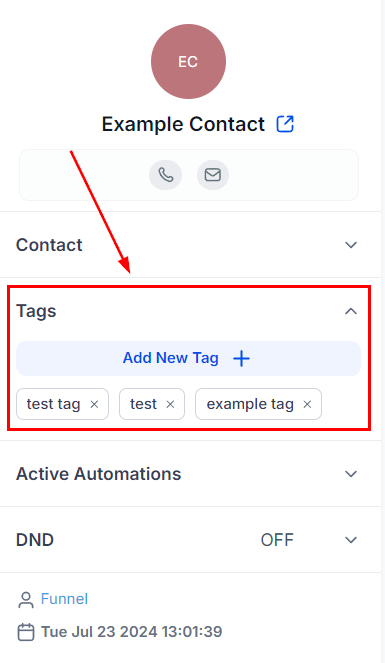
Tags
To add tags to a customer's details, simply click on "Add Tags” under the customer email on the right-hand side of your screen. Start typing in the tag you'd like to add and, if it already exists, it will appear in a drop-down beneath what you typed in. If the tag doesn't exist yet, hit the plus icon next to the desired tag and it will be added to your tags list.
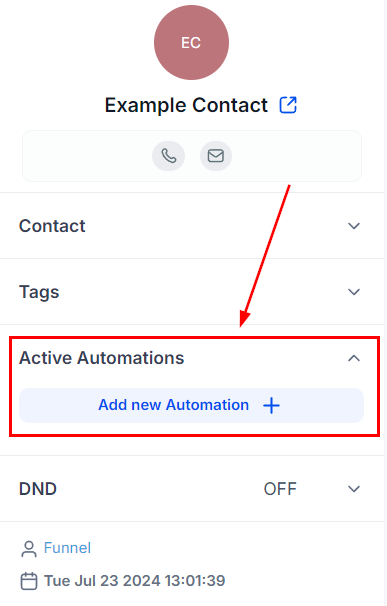
Active Automations
You can view the workflows the contact is currently in this section. If the contact is not currently active in a workflow or campaign, there will be none showing here. You can add the contact to a workflow or campaign by clicking the “+ Add” button.
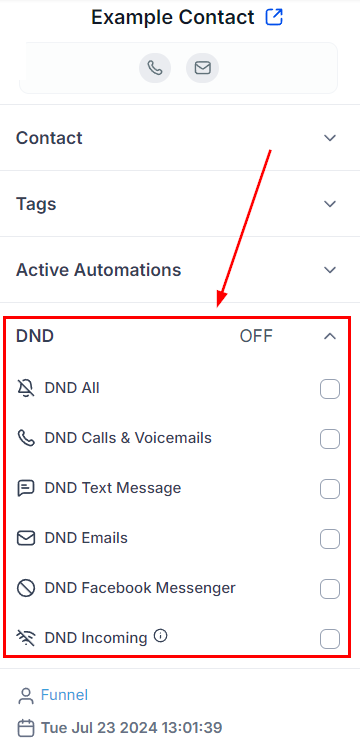
Do Not Disturb (DND)
This section will contain the DND list, marking a contact as DND will restrict all future communications out to this contact, even if you tell the CRM otherwise. To set up Do Not Disturb on channels of your choosing, just click the box next to them. You can choose to block all channels or pick some specific ones that the client doesn't want to use for communication.
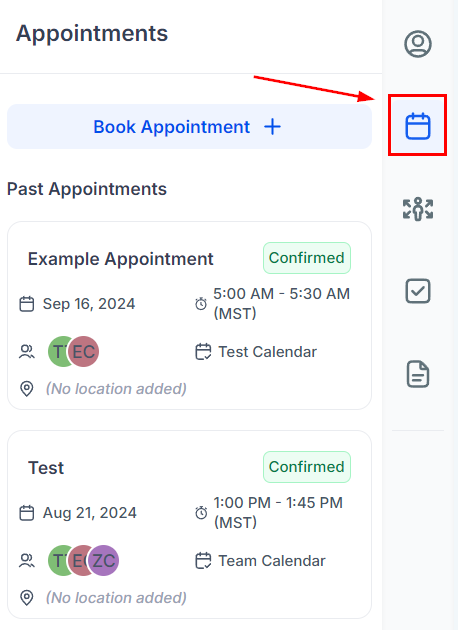
Appointment
In this section, you can view previous appointments or schedule new ones by clicking the blue "Book Appointment" button on the bottom of their contact card on the right side of your screen. A popup will appear and you can fill out the desired details.
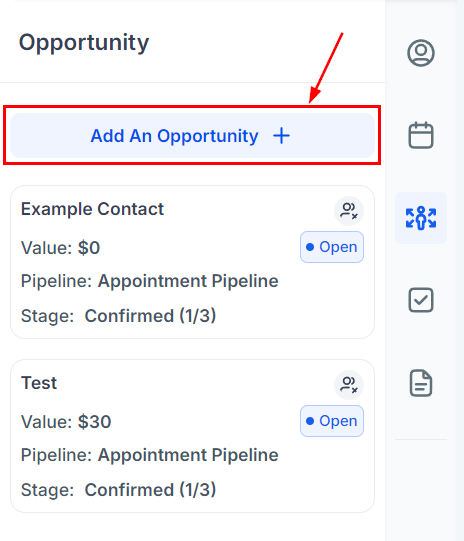
Opportunities
You can view current and previous opportunities for the contact under this section. This will allow you to easily track where your customer is in your pipeline. If you would like to edit the current opportunity, click on the Opportunity name. This will open a popup where you can view and update the opportunity.
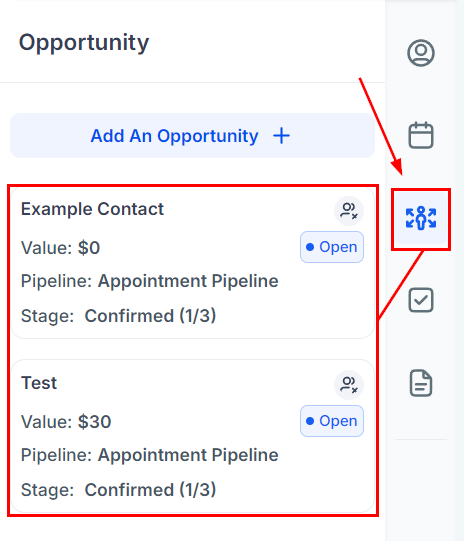
If you want to create a new opportunity for your contact, click “Add An Opportunity”. A popup will appear for you to fill in the details.
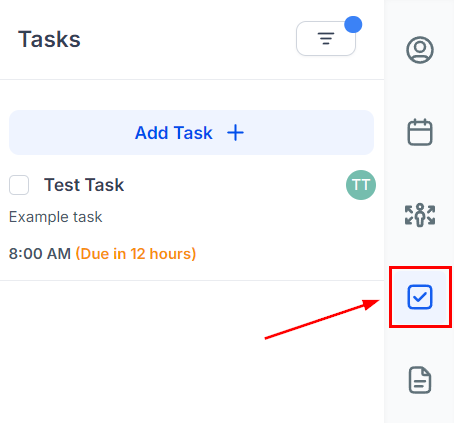
Tasks
In this section, you can view, edit, and add new Tasks you need to complete with this contact.
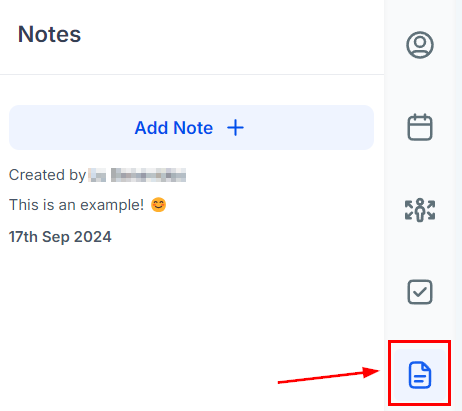
Notes
In this section, you can view, edit, and add new Notes related to the contact.
These tabs are intended to simplify your experience interacting with contacts and ensure all team members have easy access to all necessary information.
Was this article helpful?
That’s Great!
Thank you for your feedback
Sorry! We couldn't be helpful
Thank you for your feedback
Feedback sent
We appreciate your effort and will try to fix the article