Maintaining consistency in your countdown timers is crucial to creating an authentic and compelling user experience. When your countdown timer is synchronized between emails and the active page where users take action, it builds urgency and trust, motivating users to respond promptly to your offer. Below are examples and detailed steps to effectively sync your countdown timers.
Why Sync Your Countdown Timers?
Imagine offering a 10% discount valid until midnight on December 25th. The countdown timer should be visible in the email promoting the discount and on the webpage where customers make their purchases, ensuring that the sense of urgency is clear and consistent.
When Should You Sync Countdown Timers?
- Product Launch: For a new product launch, match a countdown timer on your landing page with the timer in your promotional email. Once the countdown reaches zero, the page can automatically direct users to the product page where they can make a purchase.
- Event Registration: If you're offering early bird tickets for an event, sync the countdown timer in your email with the one on the event registration page. Once the timer ends, the registration page can automatically update to reflect regular ticket prices.
- Webinar Sign-Up: For a webinar promotion, include a countdown timer in both your email and registration page. When the timer expires, the registration page can redirect to a waiting list or additional webinar information.
Steps to Sync Your Countdown Timer in Emails and Funnels
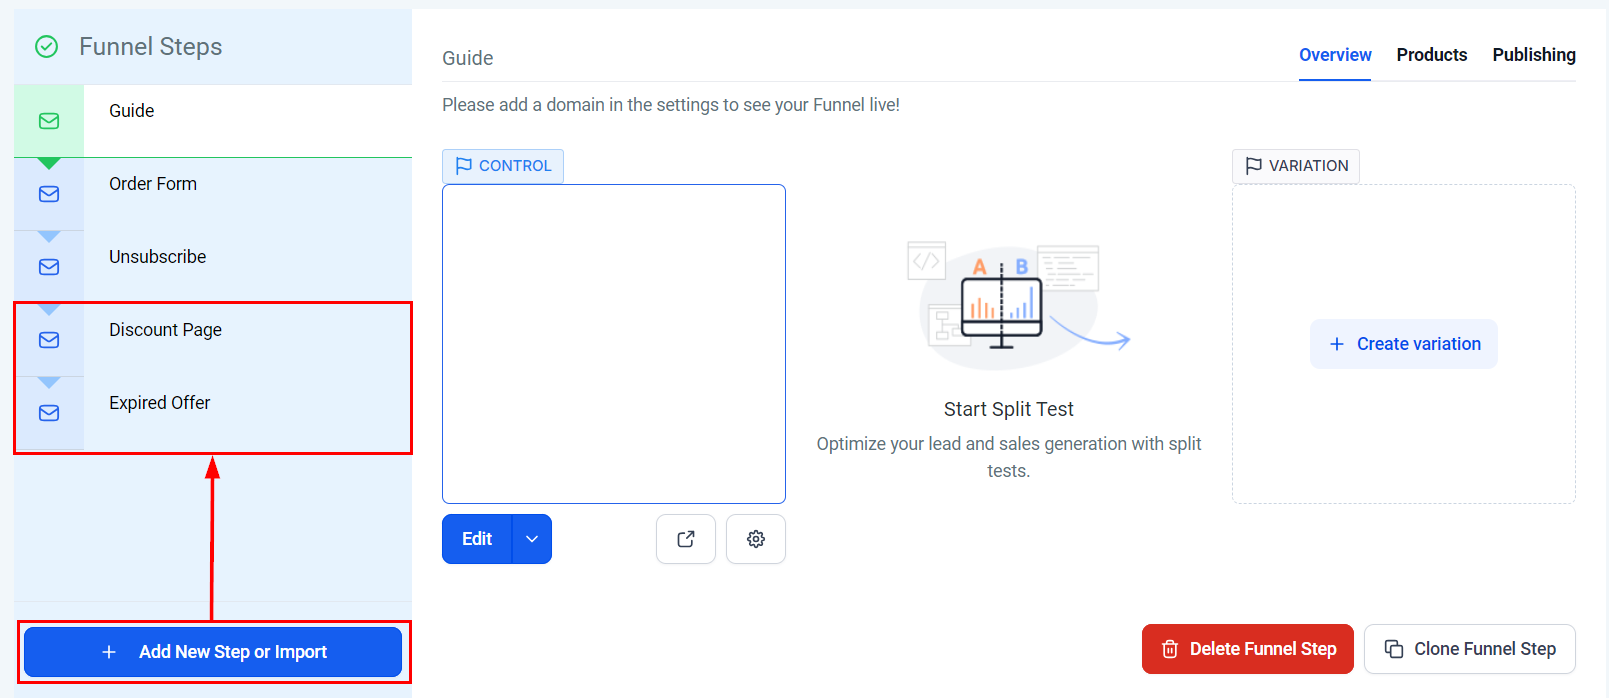
Configure Redirect Links
Access the Sites section and navigate to the specific funnel where you intend to create the redirect pages.

Set up active and expired link pages for your timer in your funnel (e.g., a discount page and an expired offer page).
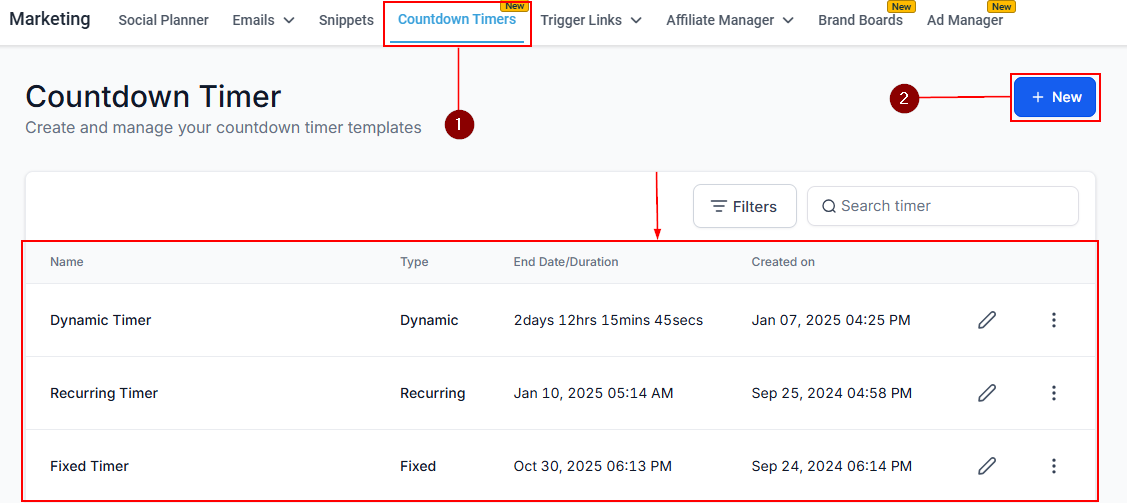
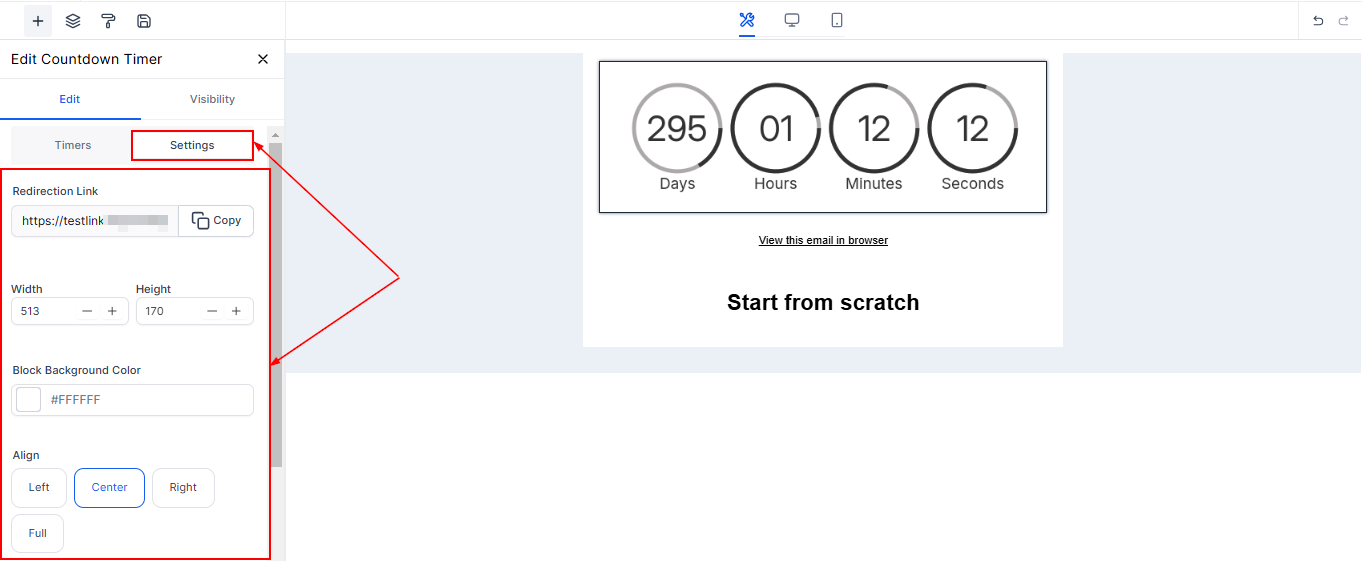
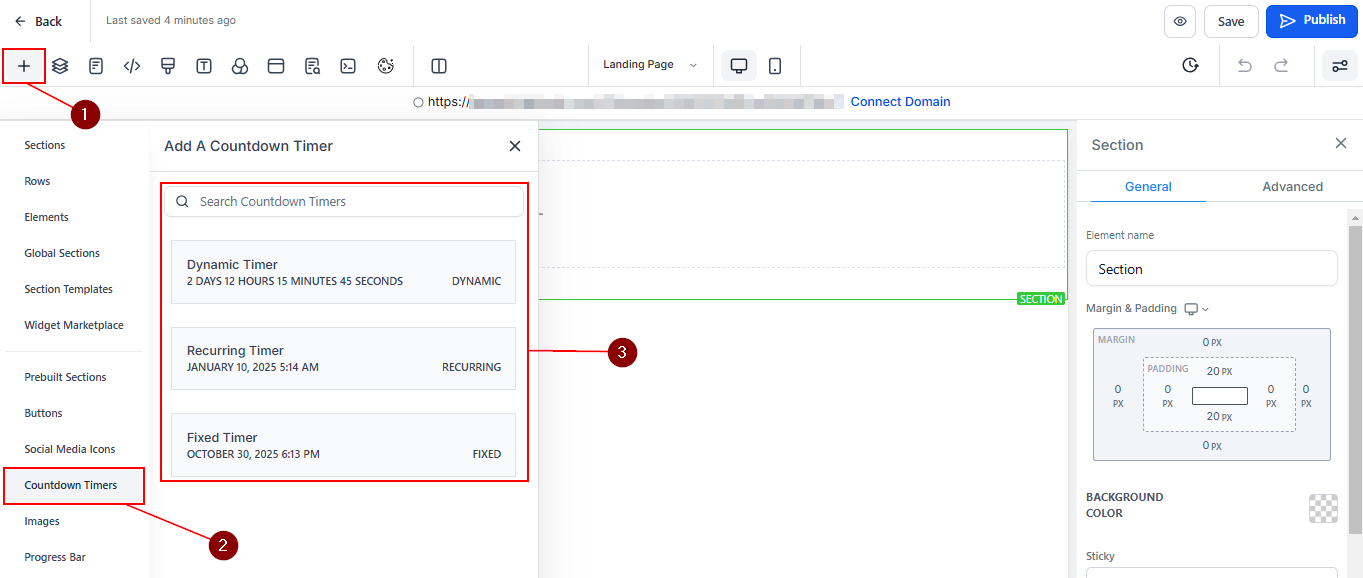
Create the Timer
Go to the Marketing section, select Countdown Timer, and either create a new timer or click on an existing one to access its editor.
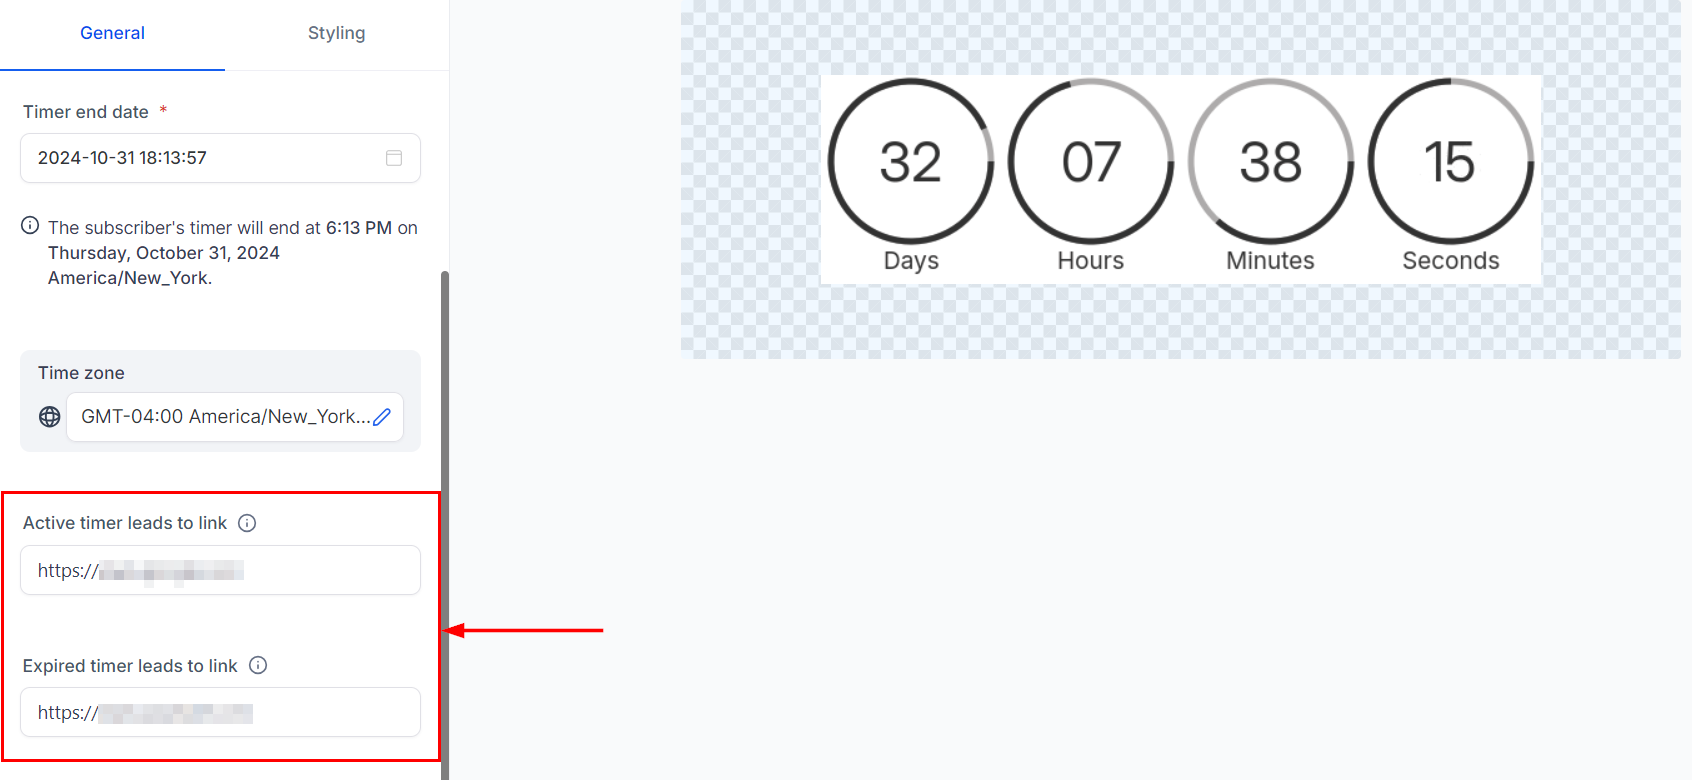
Enter the configured links in the active and expired timer section.
Add Timer to Email
Create or edit your email template or campaign within the Marketing section.
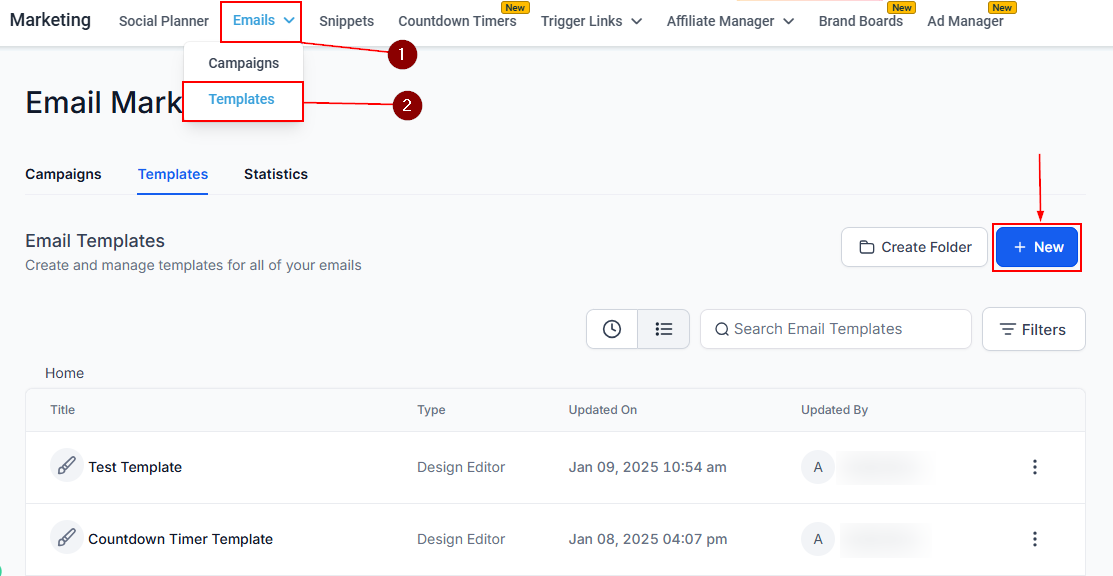
Insert the countdown timer element, and select the appropriate timer.
Configure Styling
Adjust the appearance of the countdown timer within the email settings to ensure it aligns with your brand.
Add Action Button
Include a button in the email that links to the active timer page, ensuring you use the timer’s redirect link from the settings.
Add Timer to Funnel Page
Place the same countdown timer element on the active offer page within your funnel.
Ensure the timer’s positioning and style on the funnel page match its appearance in the email for consistency.
Syncing countdown timers across emails and landing pages is essential for building a seamless user experience and reinforcing the urgency of your offer. By following these steps, you can create a unified, time-sensitive promotion that encourages quick action, whether it's for a sale, event, or product launch. Ensuring that the same countdown timer is displayed consistently across all platforms will enhance both your messaging and conversions.
Was this article helpful?
That’s Great!
Thank you for your feedback
Sorry! We couldn't be helpful
Thank you for your feedback
Feedback sent
We appreciate your effort and will try to fix the article