Smart lists are an essential tool for managing your contacts. With smart lists, you can sort, filter, and manage your contacts with ease, making it easier than ever to keep track of your customer data. Here we will take you through the different components of smart lists, and teach you how to create them. By the end of this article, you'll be armed with the knowledge you need to create and use smart lists to improve your contact management process, and ultimately, take your business to the next level.
Creating New Smart Lists
Creating smart lists is a crucial step in efficiently managing your contacts. By segmenting them according to their position in the sales process or their interactions with your company, you can easily target specific groups with personalized content.
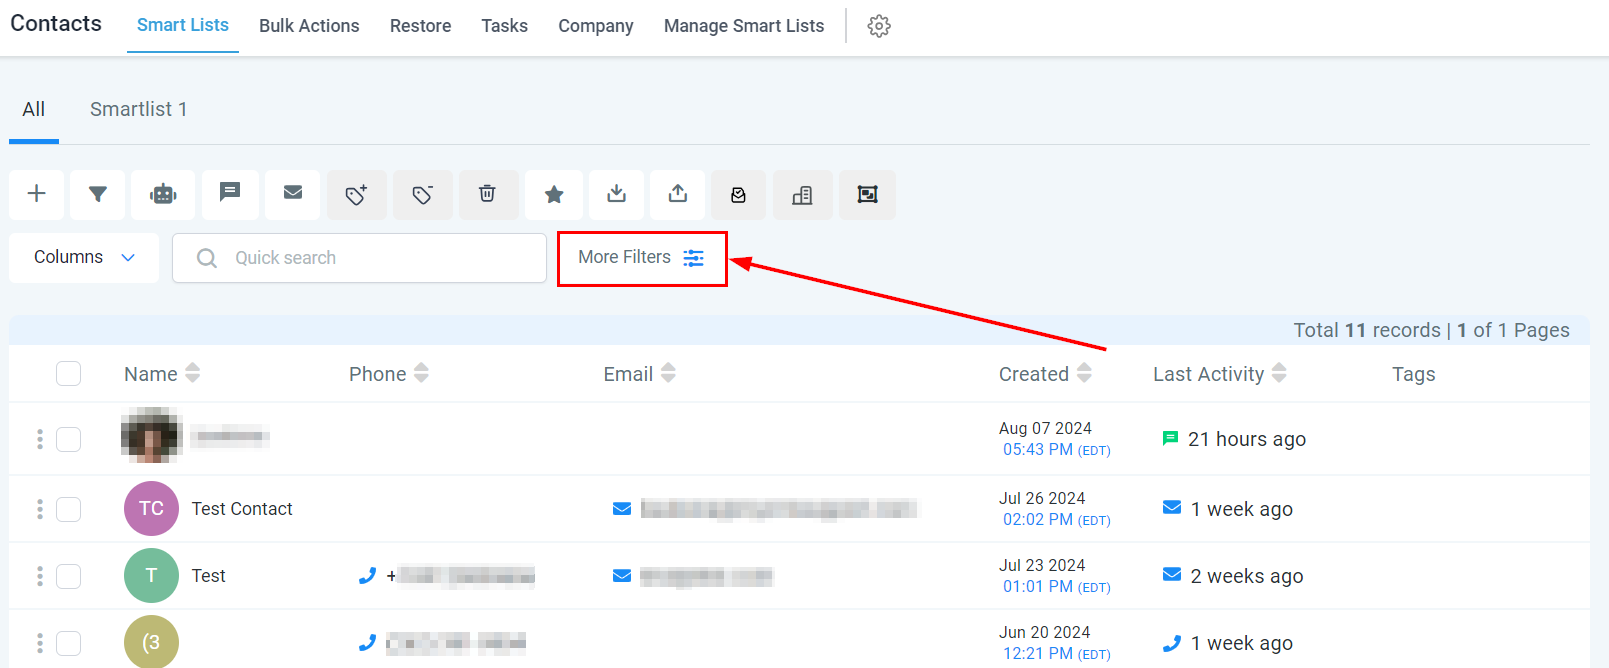
To do this, you will need to add filters which can be found by clicking on the More Filters button on the top of your contacts list.
Applying Filters
A list of filters will then be displayed on the right-hand section of your screen. These filters serve as a tool to refine the criteria for your smart lists, making them more relevant and useful.
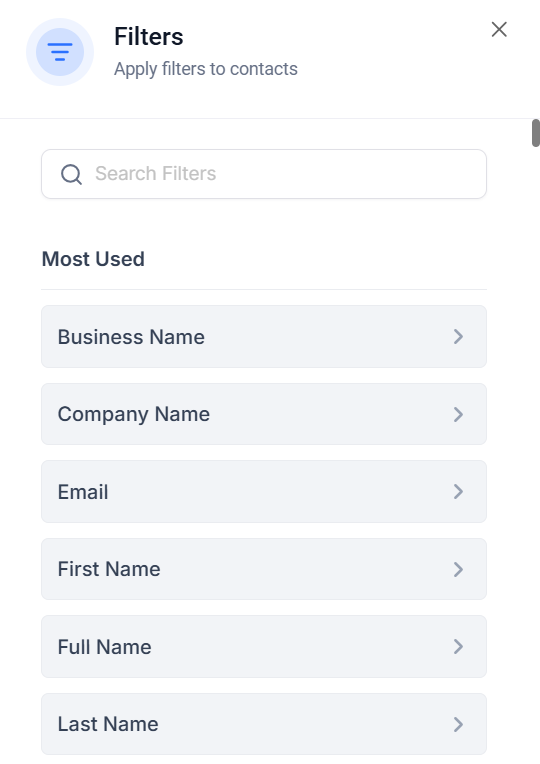
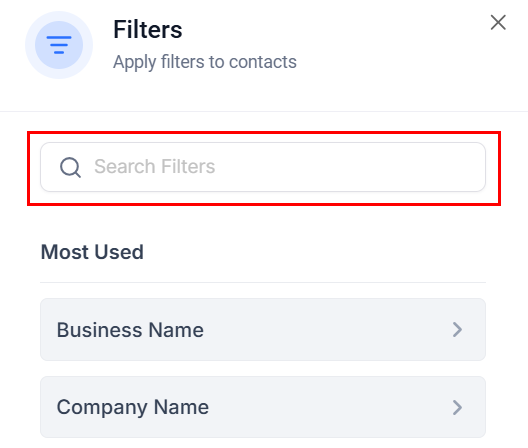
Utilize the search bar to locate specific filters you wish to apply, then select them to view additional filtering options.
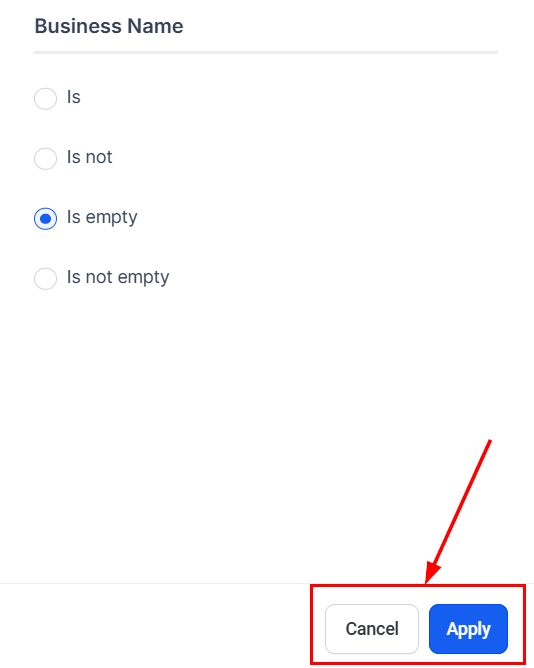
Configuring Your Filters
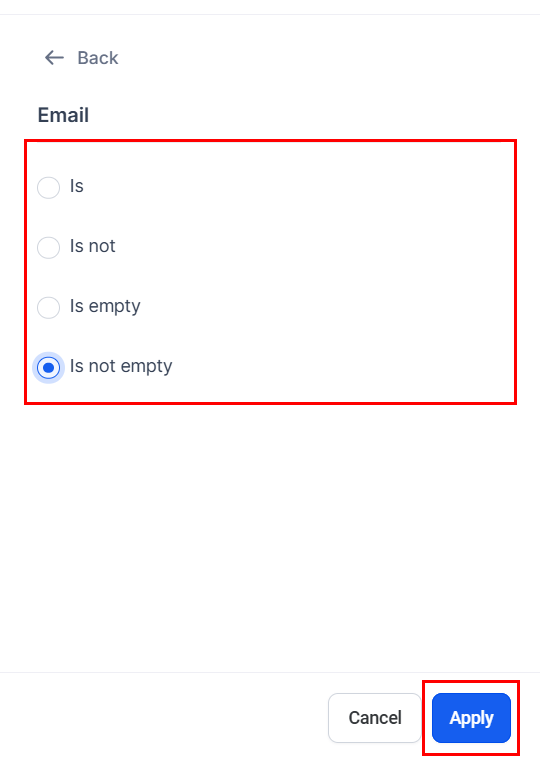
After selecting a filter from the list, define the conditions that contacts must meet to be included in the smart list. Filters such as “Is,” “Is Not,” “More Than,” “Less Than,” and “Contains” require specific input values. Meanwhile, options like “Is Empty,” “Is Not Empty,” and “Has Active Campaign” are designed to simply verify the presence or absence of the specified criteria.
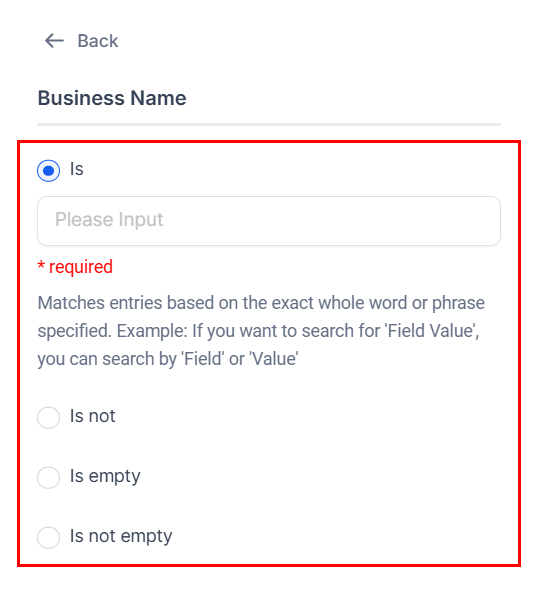
Once you have chosen your preferred option, click “Apply” to maintain your filter. Otherwise, click Cancel.
Applying Multiple Filters
To incorporate multiple criteria into your smart list, use the “And” or “Or” options. The “And” option ensures that only contacts meeting all the specified criteria are included, while the “Or” option allows contacts who meet any of the selected criteria to be added.
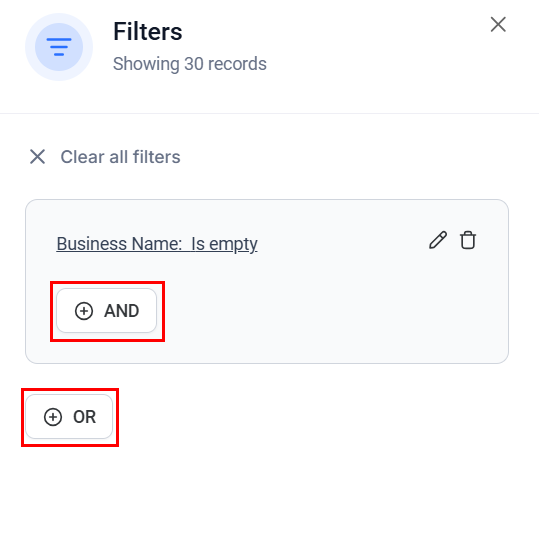
Once you have selected the most appropriate option, choose the required filter from the list once again, ensuring that you click “Apply” when completed.
Saving Your New Smart List
Now it is time to finish setting up your smart list. To do this, simply click the ‘Save as Smart List’ button located on the bottom right of the page. This button is important as it will officially save your smart list and prepare it for use.
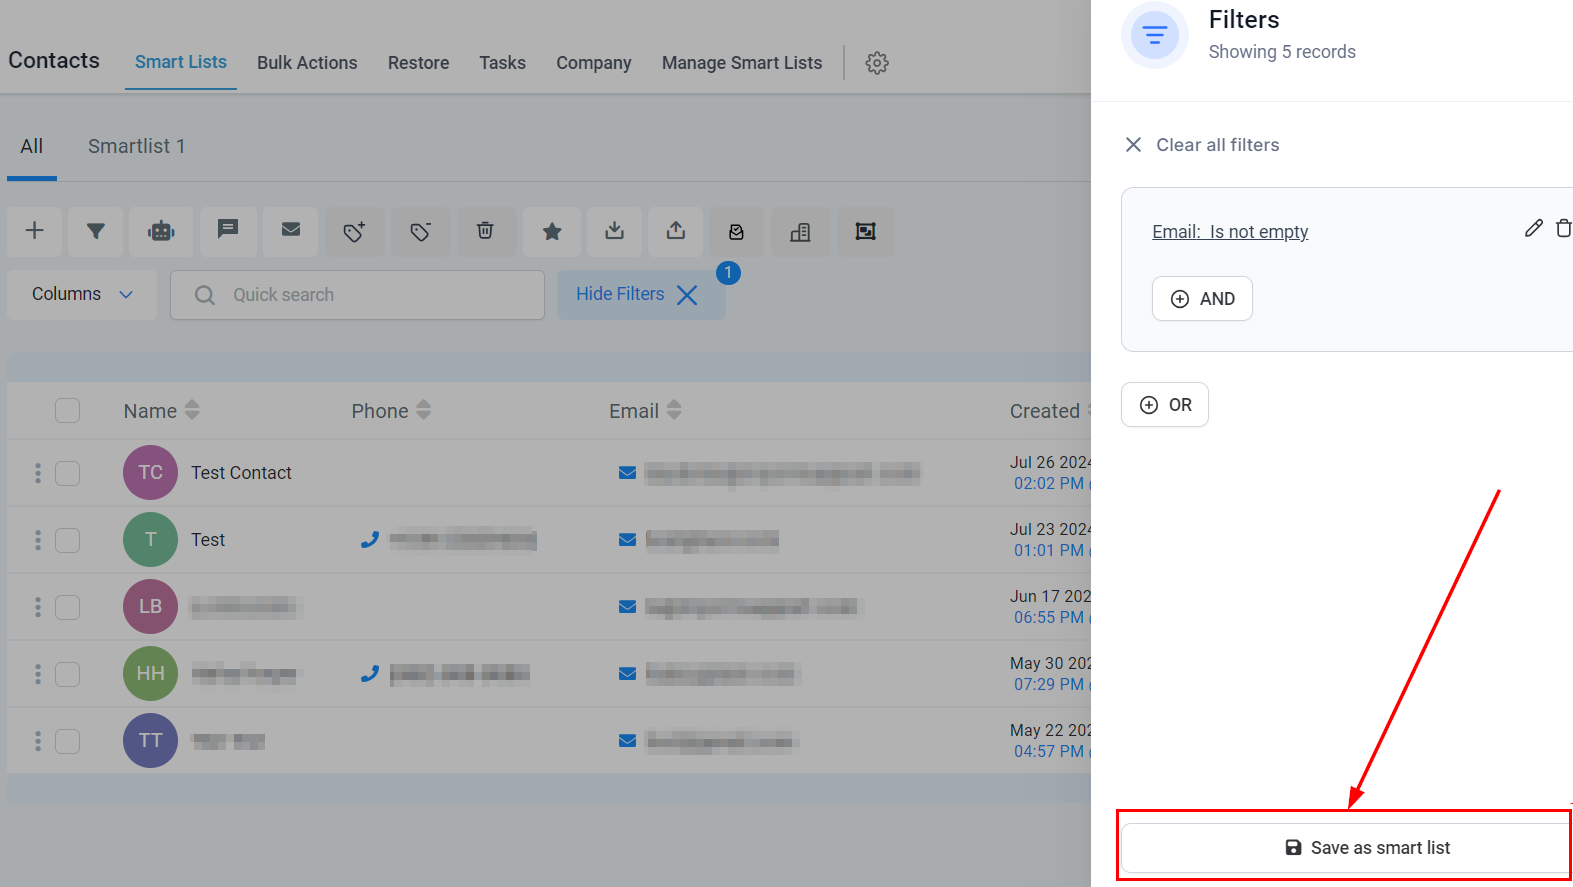
Remember, it's important to give your smart list a proper name before you save it so that you can easily identify it in the future. A good suggestion is to create a name that reflects the filters or criteria used within the list – this will help you distinguish similar lists from each other.
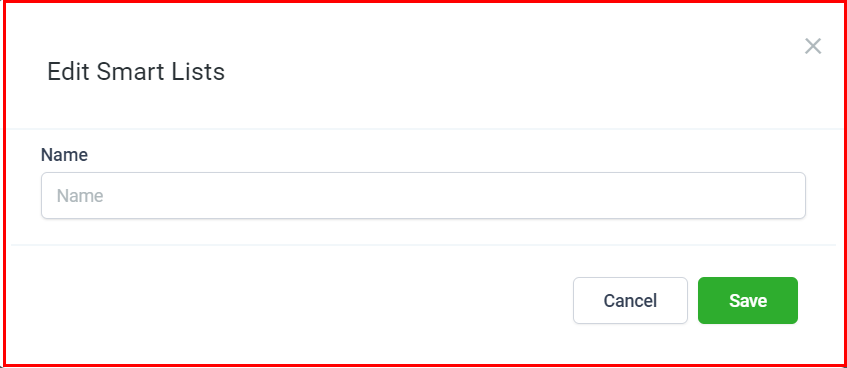
Once you are satisfied with the name, click the “Save” button.
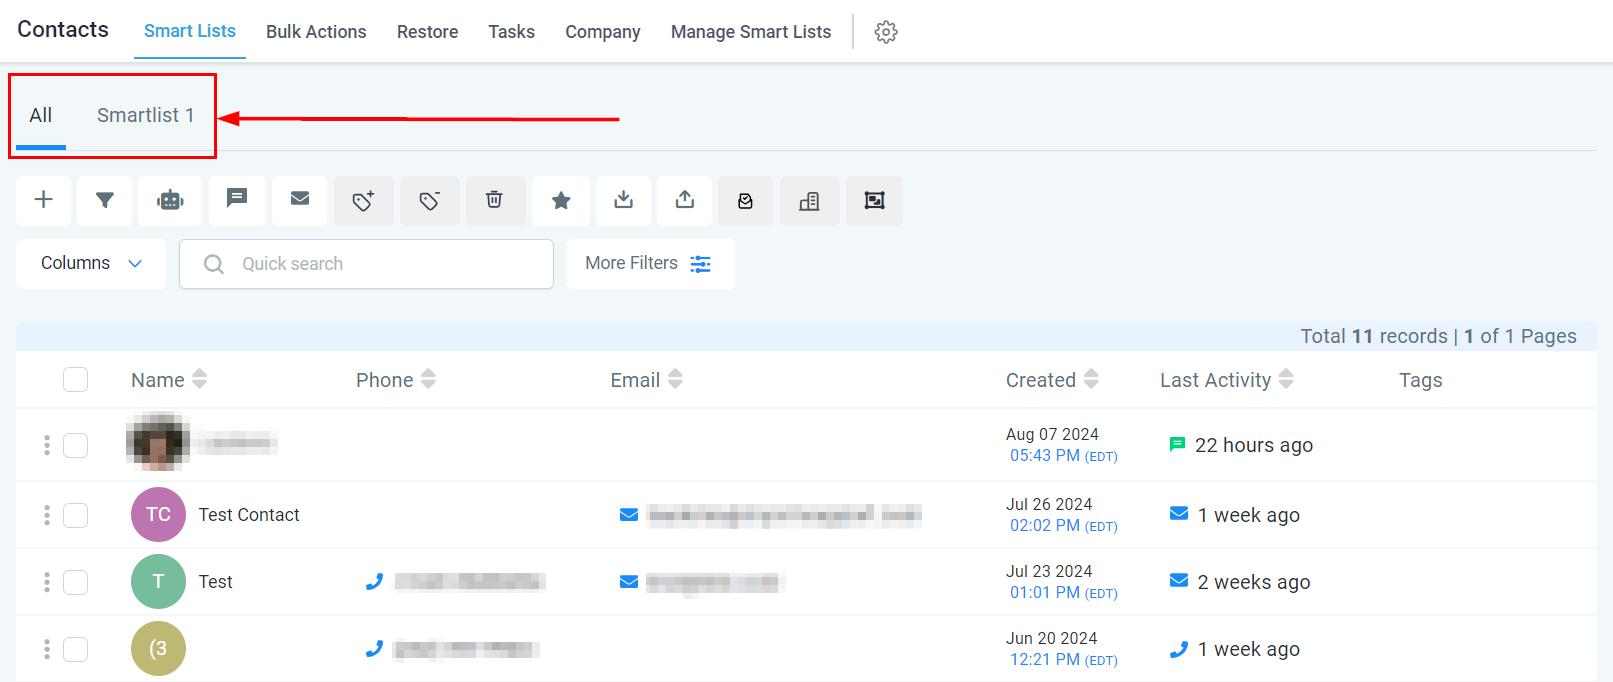
Created Smart Lists
After you have created and saved your new list, it will show up in the top row to make it easier for you to locate. By creating and saving your new smart list within this section, it remains available for future use.
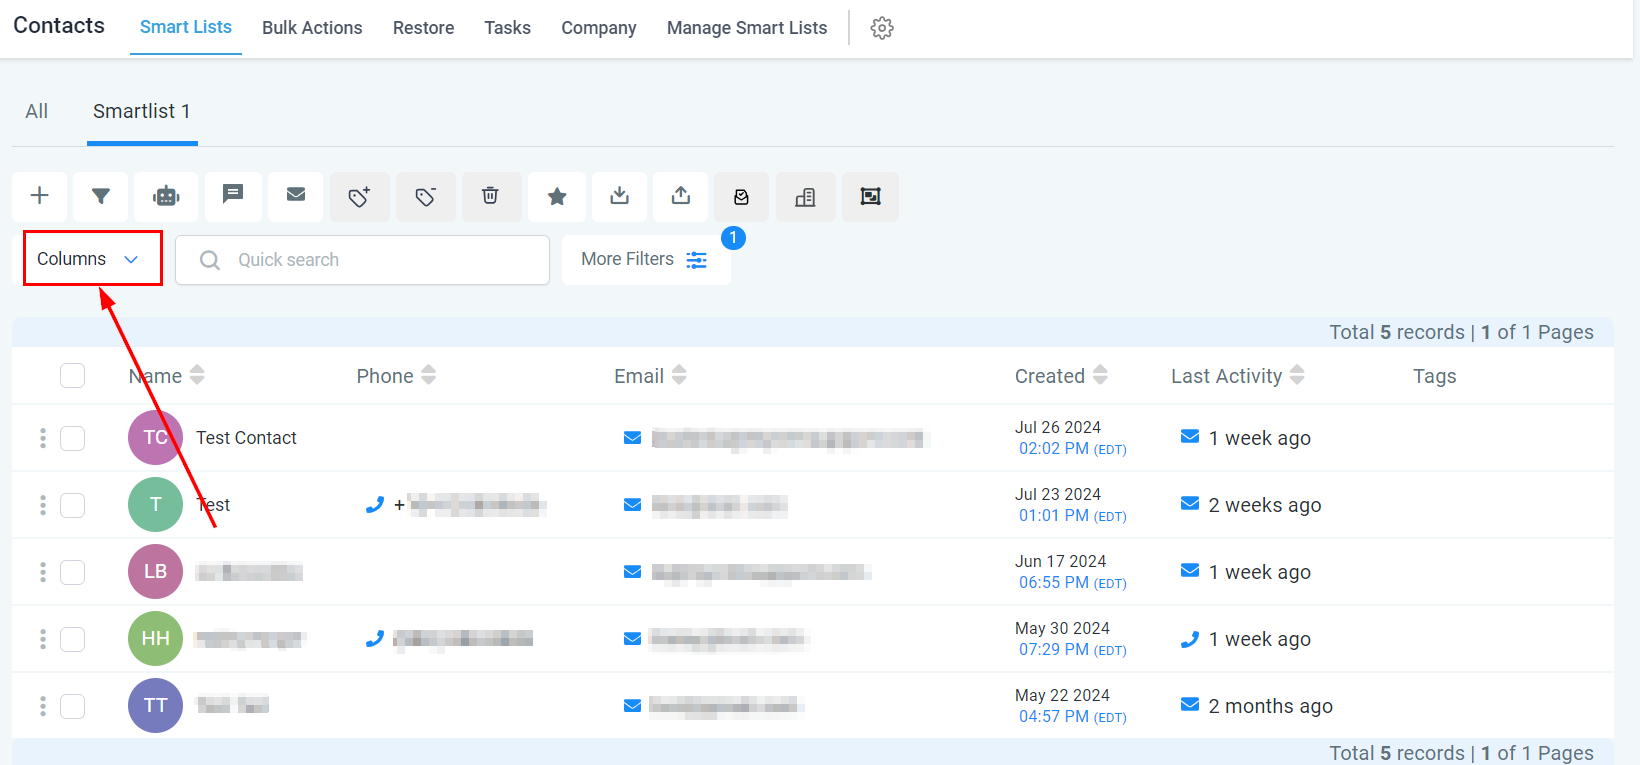
Edit Smart List Columns
To take control of the information you see in your smart lists, the Column drop-down option lets you customize and manage the data columns available to view. Located just to the top right of any contact list, simply select this drop-down icon to turn on and off functional columns custom-tailored to suit your viewing needs.
Search For Contacts
Utilize the search bar on the top right to search using contact name, business name, tags, email, or phone number by entering a minimum of 3 digits/characters.

With defined smart lists, you can save time and focus on reaching out to the right people at the right time, ultimately improving your lead generation and conversion rates.
Was this article helpful?
That’s Great!
Thank you for your feedback
Sorry! We couldn't be helpful
Thank you for your feedback
Feedback sent
We appreciate your effort and will try to fix the article